


Add Your Restaurant Menu on Facebook
You have an eye-catching cover photo and a compelling About but as a restaurant, you need to showcase your real goods. That’s right, a menu! Restaurants that are successful on Facebook go beyond the basic FB Page settings. With this series of blog posts, learn how to set up Facebook tabs like:
- Menu
- Make a reservation
- TripAdvisor Reviews
Publish and Promote your Restaurant Menu
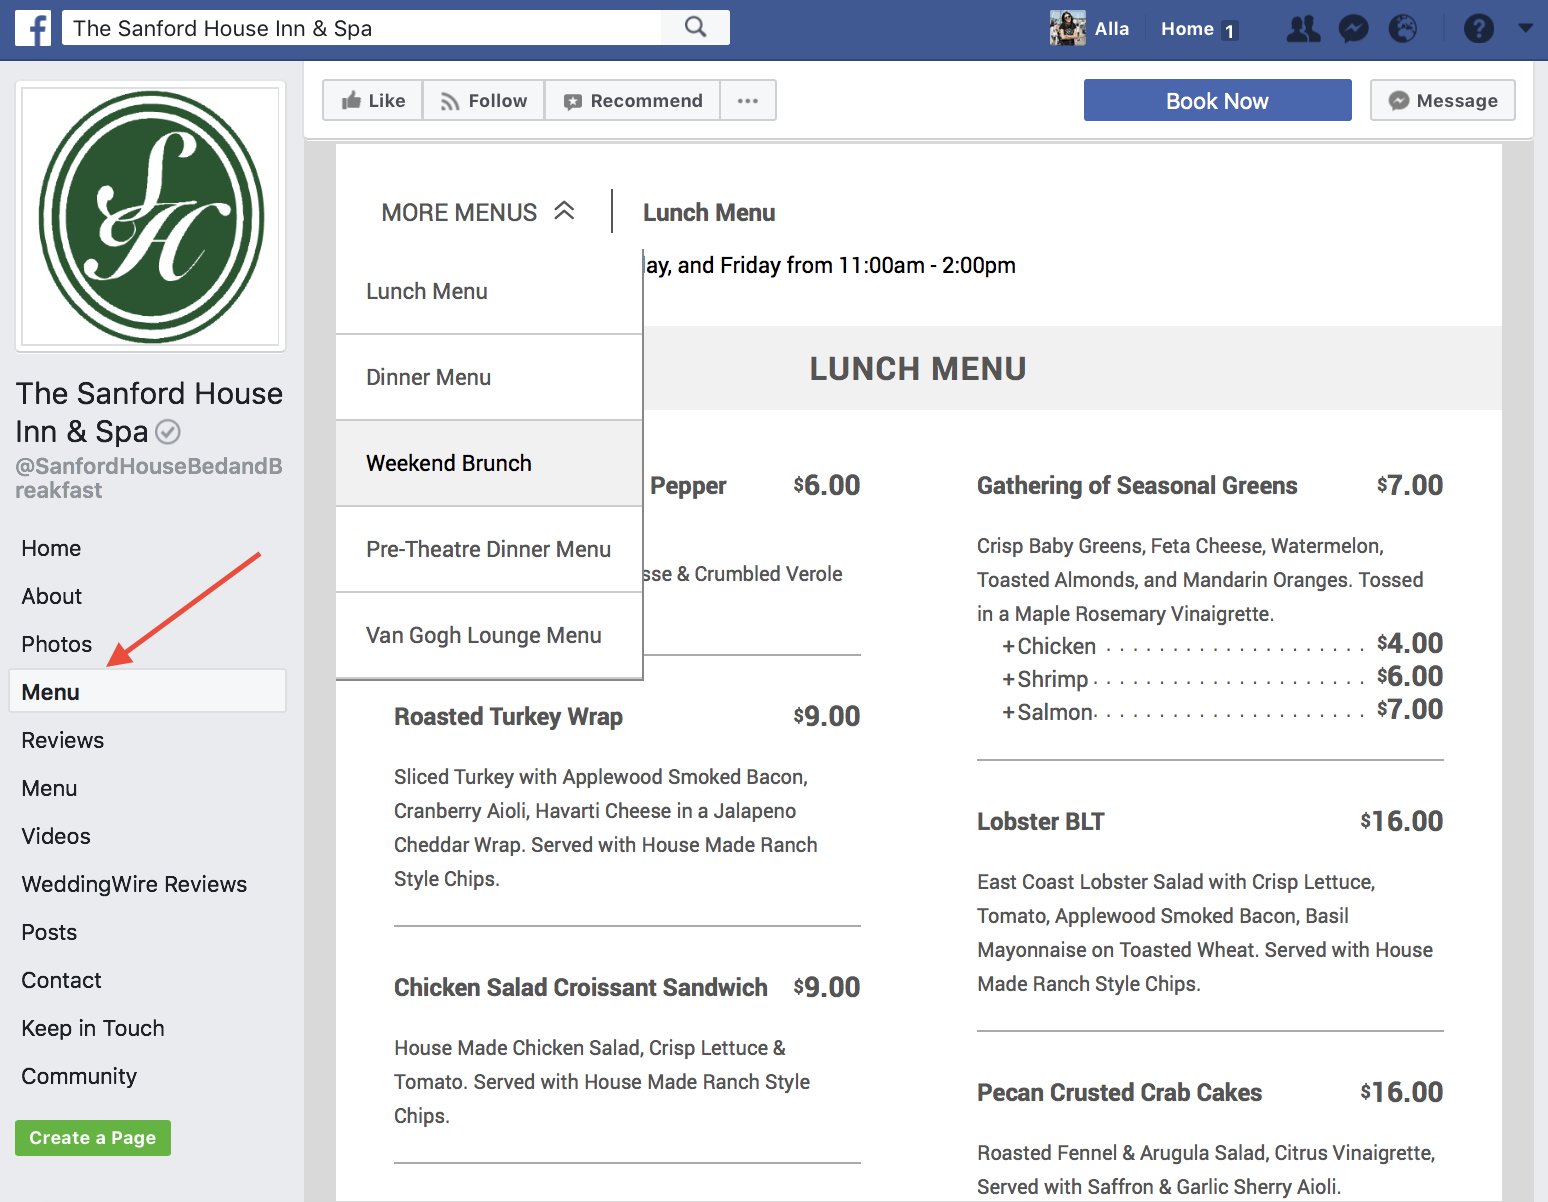
This tab (which is Free, by the way) gives your client a chance to look over the menu before they visit your restaurant. Make sure both dishes and prices are up to date. With a social presence, your restaurant management will level up tremendously.
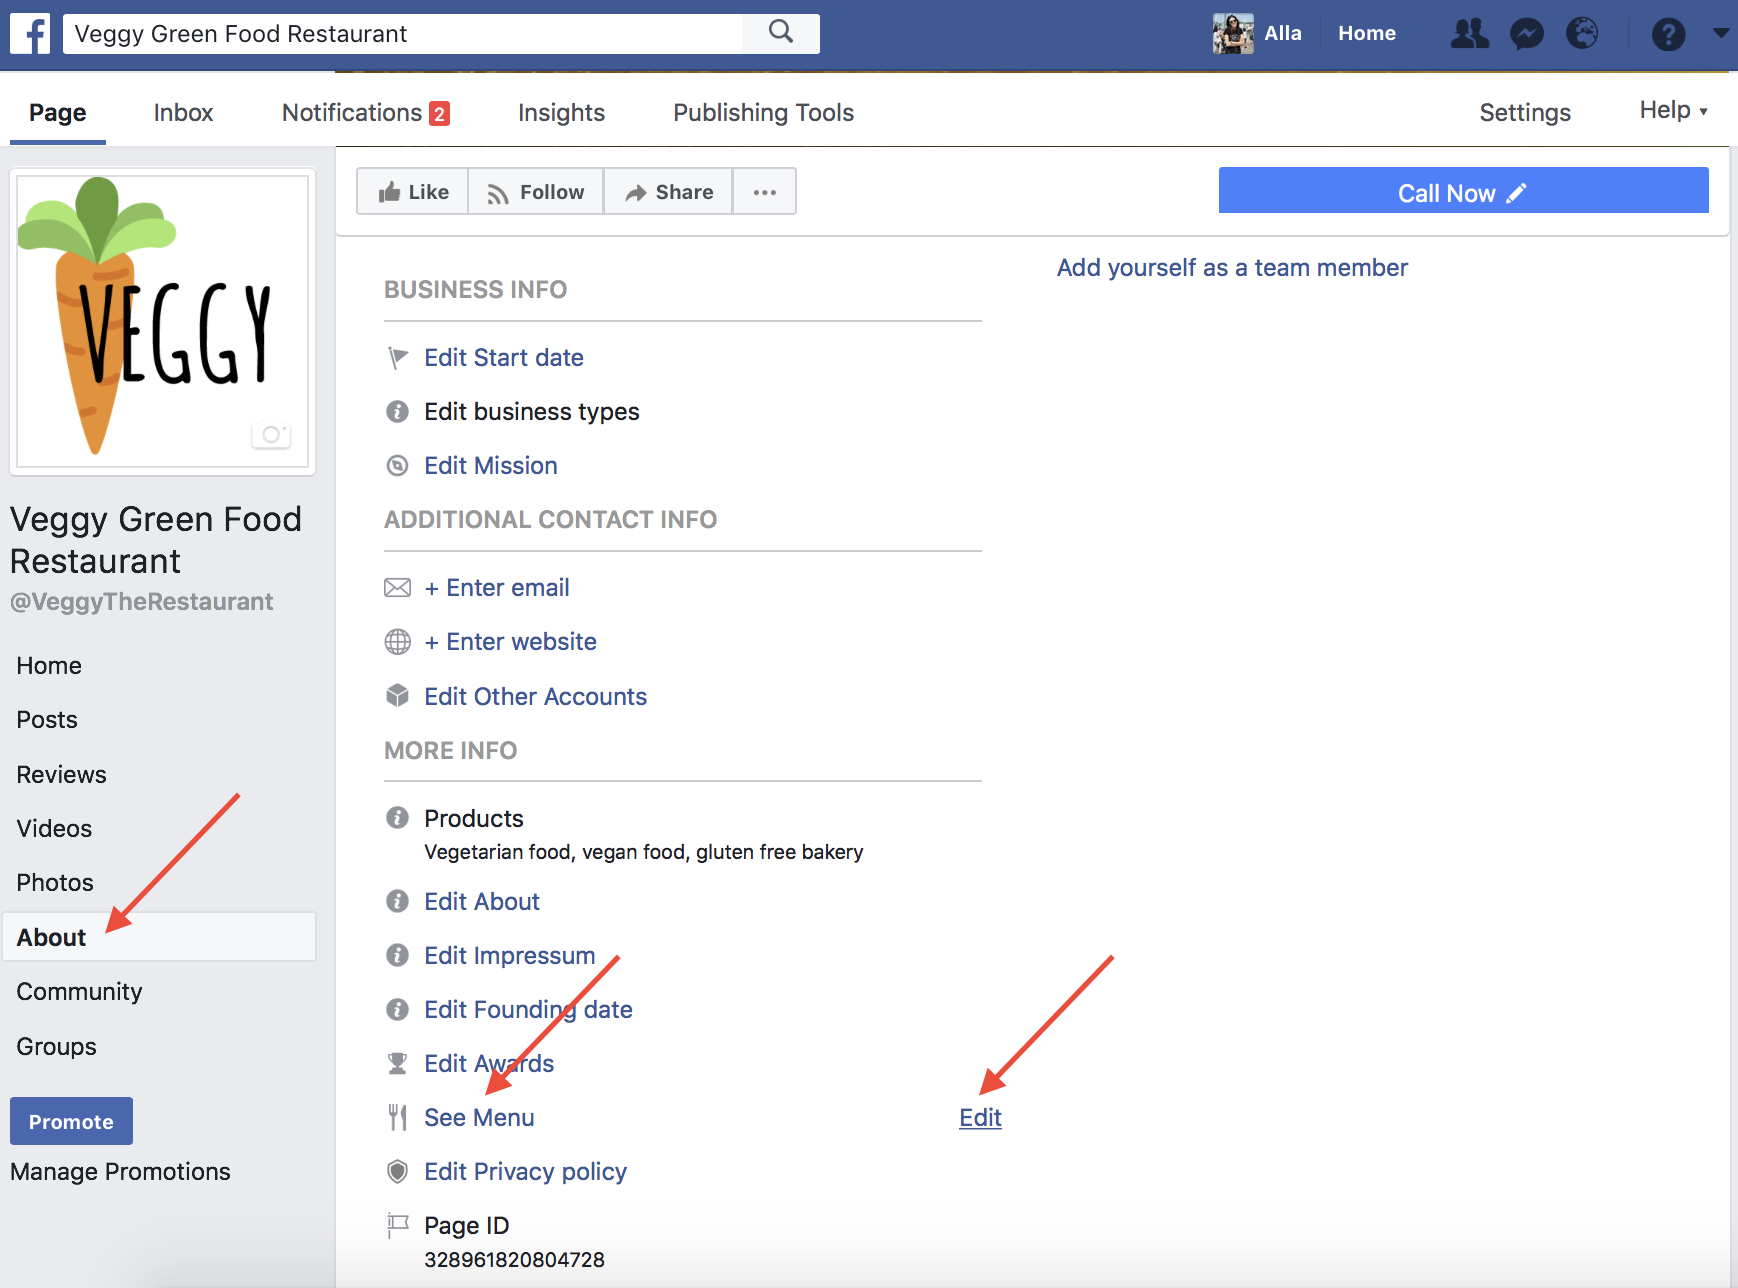
To add a menu to your Page:
- Click About on the left side of your Page and scroll down to see Menu.
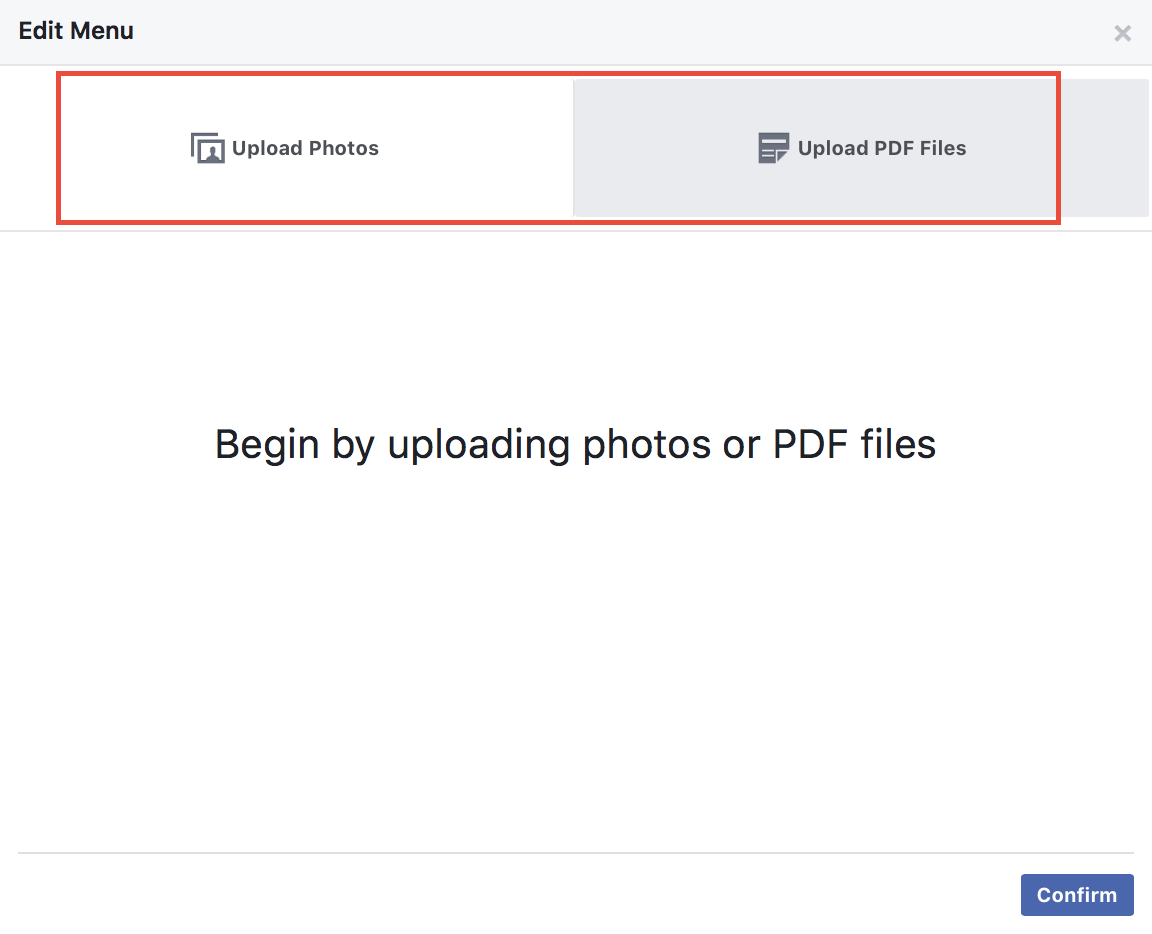
- Upload a photo or PDF file of your menu
- Once your menu has finished uploading, name each file, e,g you can upload beverages, salads, main course, and desserts separately.
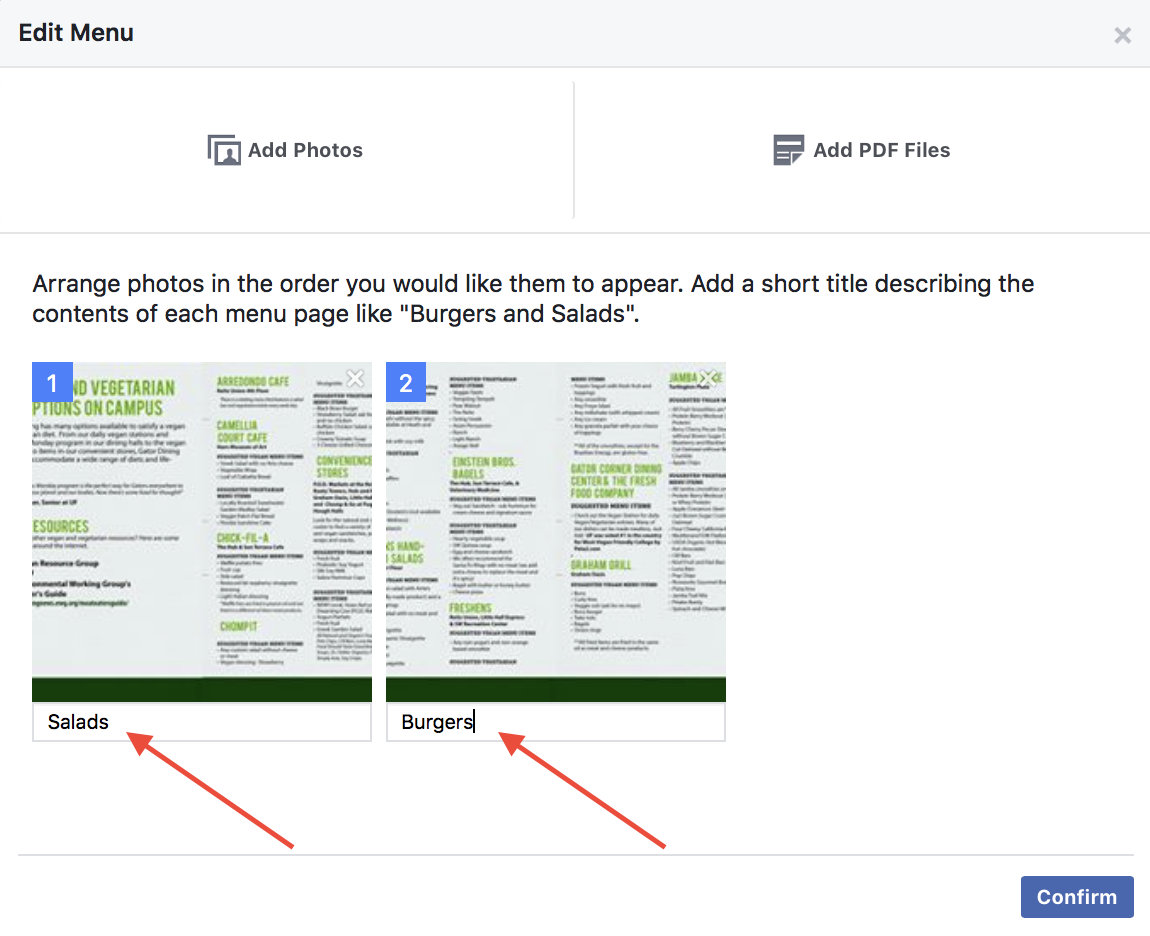
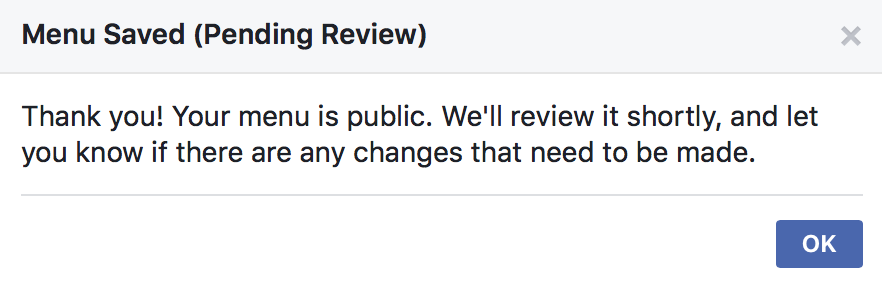
Press Confirm. Keep in mind that Facebook may review your menu and let you know if the menu needs any changes.
- Now make it live in Settings. Hit Edit Page and choose Tabs.
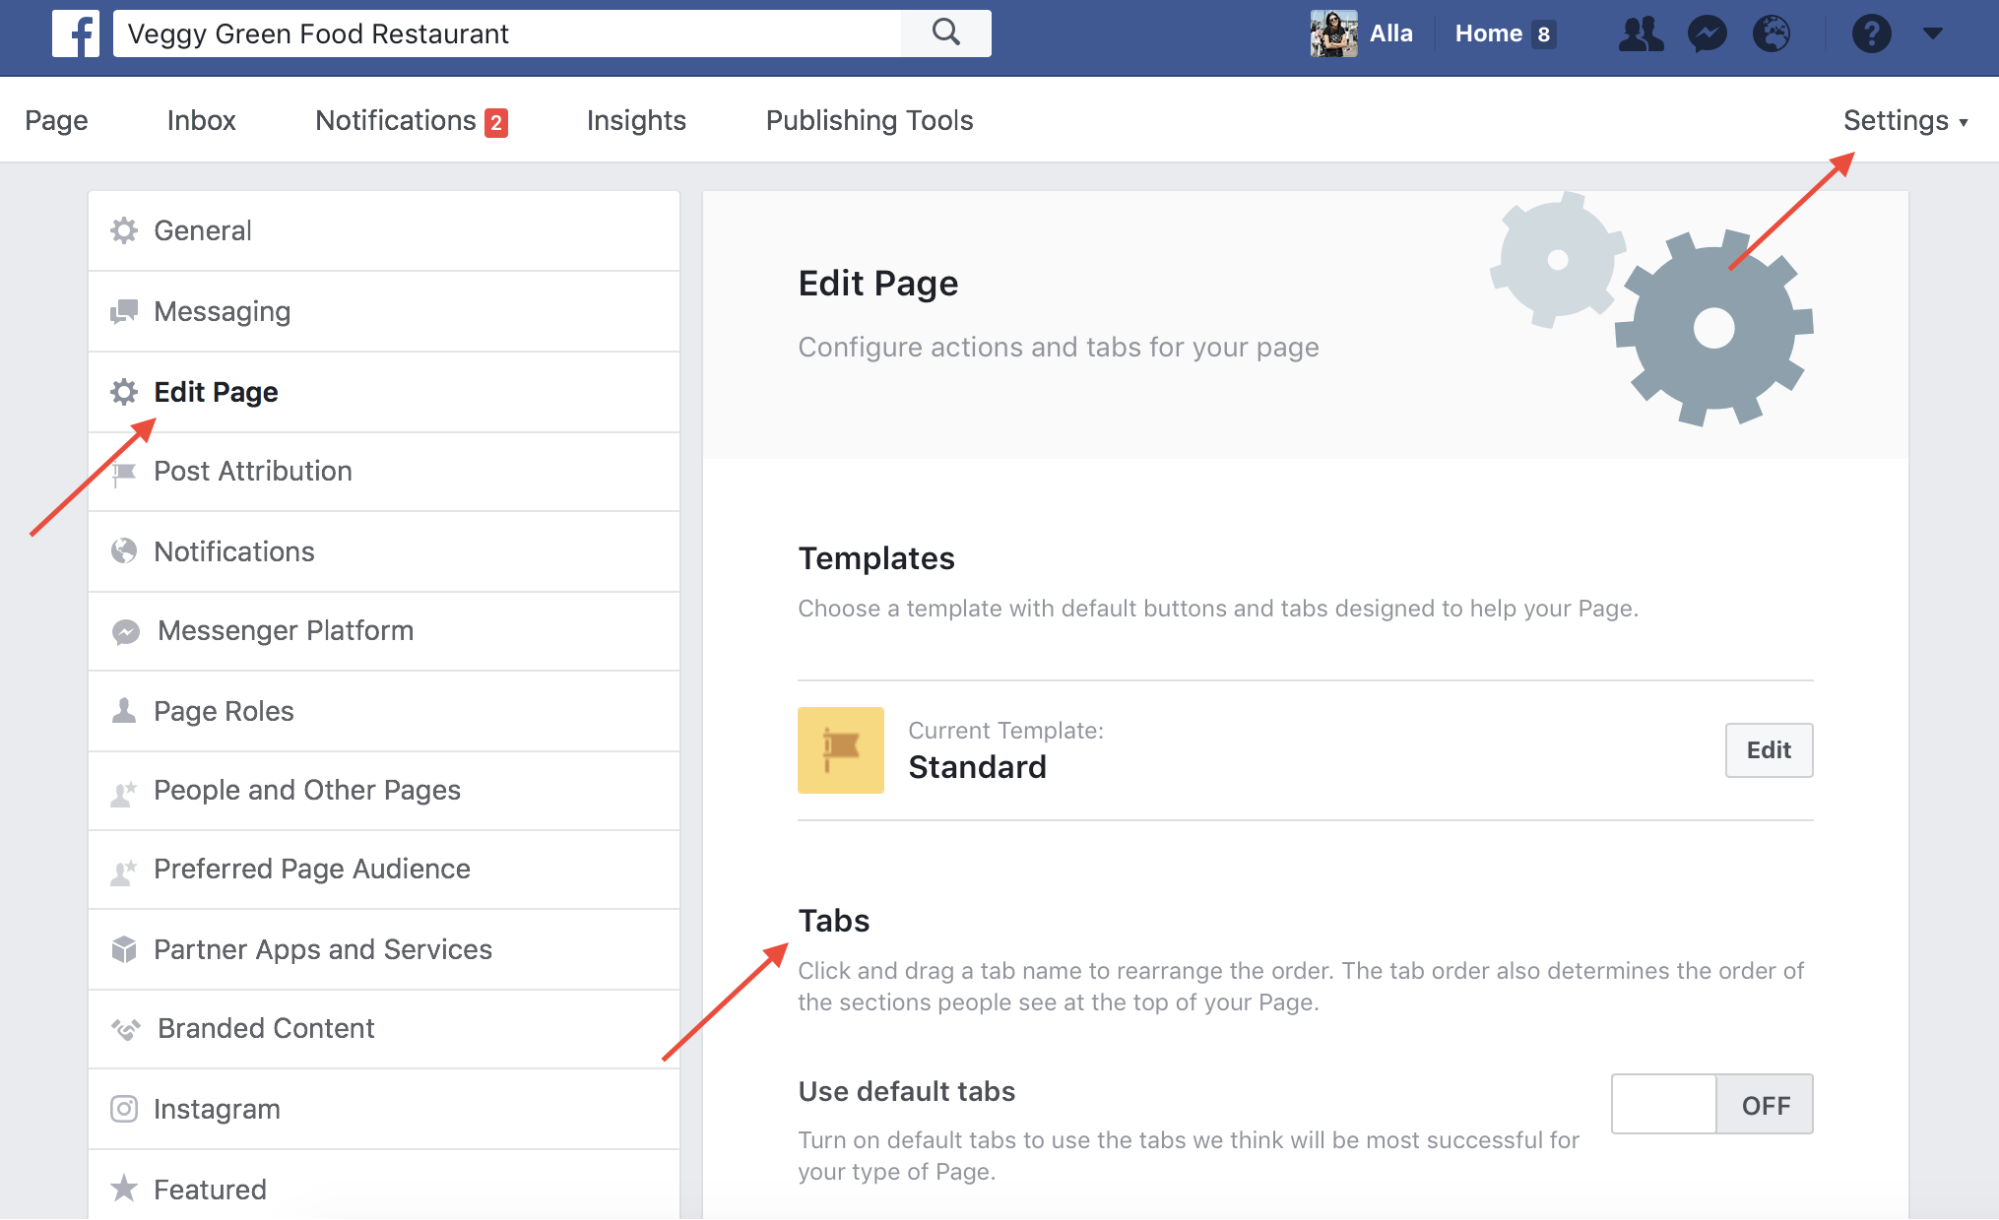
Scroll down and click on Add a Tab – add Menu.
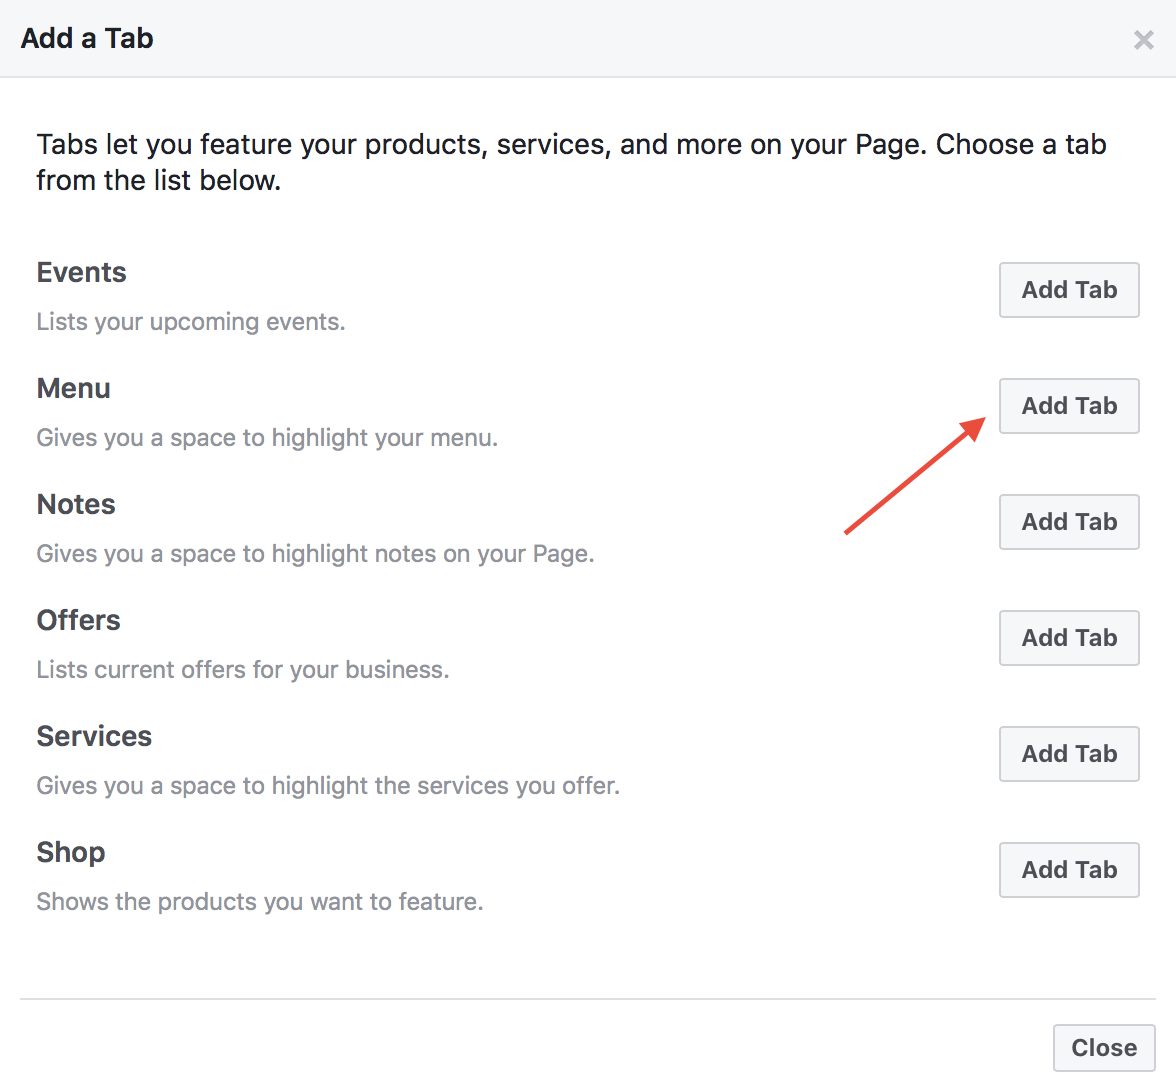
When reviewed, you will have a neat menu tab on your page. You can update it whenever you want. Congrats! You are all set.
Choose what describes your business best:
What do I choose?
Enterprise: for multi-location and direct selling brands. Manage thousands of social media pages of your local distributors, partners, or franchisees.
Agency: for marketing agencies. Manage all your clients’ social media pages on one platform.
